


Until recently I’ve been rather dismissive of Apple’s Photos and its predecessor iPhoto, but beneath the surface there are some pretty neat features that make it useful to experienced photographers as well as novice photographers and general consumers.
To be clear from the outset, Apple Photos isn’t going to take the place of Adobe Photoshop or Lightroom, but it can come in handy and there are more editing controls than you might first think.
By default Photos starts-up whenever you connect a device with stored images to your Mac. It then gives you the option to download any new images.
If you’re an enthusiast photographer and you want to have images stored in standard folders and be able to import them into Lightroom or browse them in Adobe Bridge, it’s usually best to ignore the Photos offer of assisted downloading.
Just copy the images to a folder as normal and then import the images into Photos from there. You can prevent Photos from automatically starting for a particular device by removing the tick from the box marked ‘Open Photos for this device’.
If you have an iPhone and/or iPad, you may like to use the option under Photos>Preferences>iCloud, to upload your images to the iCloud Photo Library so you can access all your photos and video from your other Apple devices. It’s a useful feature, but you’ll probably find that you use up the 5GB free space up quite quickly. It’s easy to purchase more and rates are pretty reasonable starting at £0.79/$0.99 per month for 50GB.
Apple Photos: organising images
Photos automatically organises images into virtual albums which you can see in the column on the left of the library screen. It automatically sorts images taken on an iPhone or iPad depending upon how they are captured, but it’s easy to create new albums of your own choosing.
Simply select a few images and click on the + at the top right of the Library view then select the option you need. The selected images will be put into the new Album.
Once the album has been created you can drag other images into it. Smart Albums allows you to create an album that contains images that are selected using specific criteria such as a date range.
The People album contains all the images in which Photos has found a face. It also attempts to identify the person in the image and group them by contact name. It’s isn’t perfect, but it makes a good start at helping you get organised.
The Places album is also interesting, it contains any images that have a GPS tag. Clicking on the album opens a map to reveal where your images where captured or geo-tagged.
Apple Photos: editing images
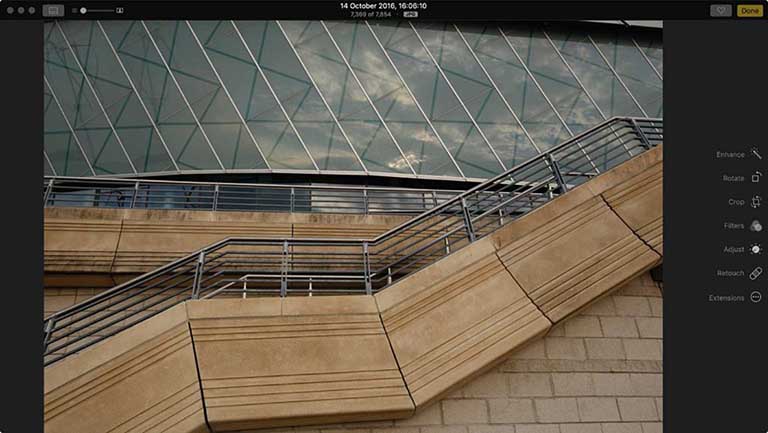
To edit an image within Photos, double click on it in the Library view then click on the icon in the top right of the screen that looks like some sliding controls.
A small selection of adjustments controls is now available on the right of the screen. Enhance is a one-click adjustment tool which can be handy on occasion, but most enthusiasts are going to be more interested in the controls found via Adjust and Extensions.
SEE MORE: The differences between Lightroom and Photoshop
When you open the Adjust options for the first time you won’t see much in the way of controls, but if you click on ‘Add’ in the top-right you get access to more. Most of them use sliding controls but they are still powerful.
Also, if you hover over the Light, Color or Black & White sliders a dropdown arrow appears to give you access to more detailed controls.
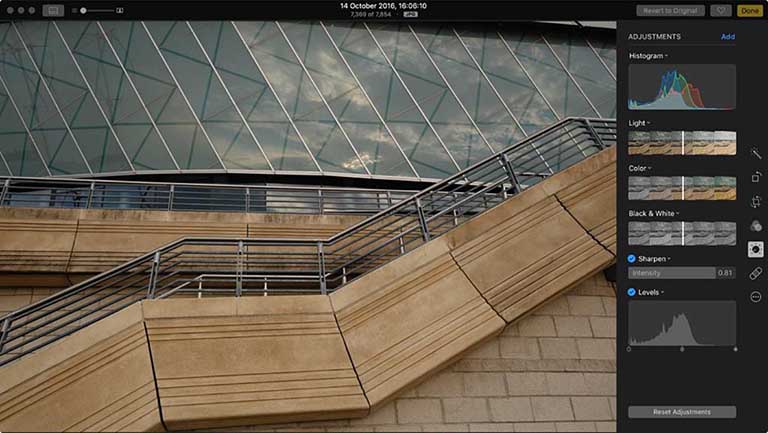
It’s not immediately clear what the difference is between some of the tools, Brilliance, Exposure and Brightness, for example, control similar things but they are subtly different and it’s best to experiment with them to perfect your image.
Similarly the controls under the Black & White option aren’t easy to distinguish.
Experienced photo editors will be pleased to see a Levels control, but it doesn’t work in quite the same as some other Levels control as there are handles at the top and bottom of the screen to adjust the image.
SEE MORE: Best Lightroom tips for smarter post-processing
Apple Photos: Using extensions
Extensions are third party plug-ins that enable you to increase the range of controls available from within Photos. They can be downloaded from the Mac App store, some being free and others being available for a modest cost.
Some software developers such as Serif provide extensions with their standard software.
Affinity Photo (£39.99/$49.99), for example, comes with six extensions: Develop, Haze Removal, Liquify, Miniature, Monochrome and Retouch. They’re really useful.
External Editor For Photos (£0.79/$0.99) from Karsten Bruns is useful as it enables you to open and edit an image in other editors, including Photoshop, from within Photos. Once you’ve finished editing the image you can Photos.
Macphun Intensify (£7.99/$8.99) is also worth considering as it has powerful controls that are easy to use. You can even apply adjustments to layers and create layers masks quickly and easily.
Apple Photos Verdict
Although I’m a long-term dedicated Photoshop user, I’ve started to use Photos more and more for two main reasons. Firstly I like the fact that using the iCloud Photo Library enables me to see images on all my Apple devices.
I find this especially useful for posting to Instagram as I can select and edit an image on my MacBook and then post it to Instagram from my iPad.
I also find Photos is also useful for making minor tweaks such as straightening a horizon or cropping to a new aspect ratio before sharing them to Facebook or in a message.
In addition, some of the Extensions are very powerful and it’s nice occasionally to use them rather than Photoshop. I also like the fact that it’s possible to revert right back to the original image at any point with just a click.
I’d classify Photos as a ‘nice to have’ piece of software which simplifies a few things, but isn’t essential. I’m glad it’s provided for free on my MacBook but I probably wouldn’t pay much for it.
READ MORE
Free Lightroom keyboard shortcut cheat sheet
iPhone 7 Plus Camera Review
iPhone 7 camera review